

In this guide we will show you how you can quickly install Workshop mods on your Soulmask server.
Danger
Always back up your world manually before installing any mods!
Note
Steam Workshop items are downloaded when the server starts, so changes apply after saving and restarting your server.
Using the Steam Workshop Installer Recommended
The easiest way to install mods is directly through the panel.
- 1Log in to Bropanel and select your Soulmask server.
- 2In the sidebar, go to
Modsand open theBrowsetab. - 3Search for the mod you want and click
Install. - 4Restart your server.
How To Get Your Workshop Mod IDs
As an alternative, you can install mods by pasting their Workshop IDs directly into your server's Settings. You will need to know how to get a Workshop ID for each mod you want to install. You can view all the Soulmask mods here.
Once you find the mod you want you need to copy the URL. Let's use this URL for example: https://steamcommunity.com/sharedfiles/filedetails/?id=3070288532&searchtext=bhop
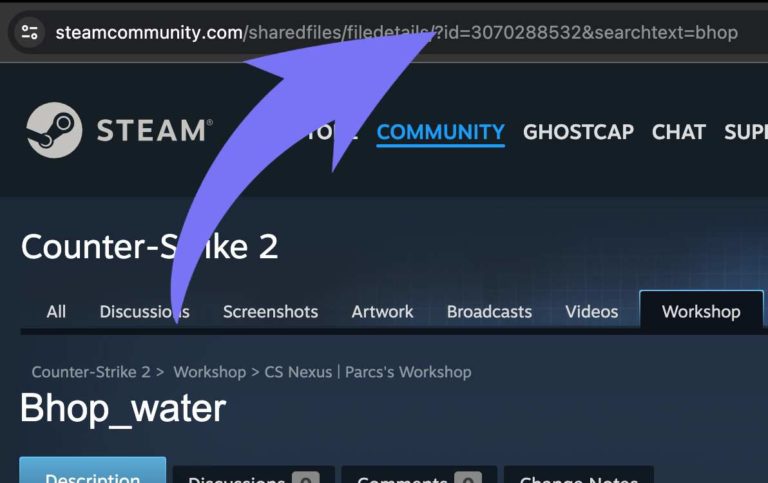
As you can see from the numbers in the URL, our mod ID is 3070288532
Installing Mods in Settings
- 1Load Bropanel and select your Soulmask server.
- 2In the sidebar, go to
Settings. - 3Look for the
Workshop Modssection and add the IDs for the mods you want like this.- For a single mod:
3325629900 - For multiple mods:
3325629900,3325143163,3325592770
- For a single mod:
- 4Click
Save & Restartto apply your changes.
You can then confirm if the mods have been installed by going to Files and looking in /WS/Mods. You should see all your Soulmask mods there if they downloaded successfully.